Toasted Coconut Cashew Butter {Recipe ReDux}

Wow! I can’t believe it’s already May 21. That means t-minus one week until yours truly’s birthday AND it’s Recipe ReDux time! This month we were tasked with showcasing kitchen staples that we now make from scratch – but in the past purchased.

For me, that’s got to be nut butters. Ever since discovering how easy it was to make nut butter thanks to my Homemade Nutella recipe from a previous Recipe ReDux, I’ve been making a new type of nut butter weekly.

And I literally have to make a new jar weekly. The boyfriend likes to eat massive spoonfuls straight out of the jar, so we go through nut butters pretty quickly in our household. [I also eat it straight from the jar but in much smaller, daintier bites.]

coconut_cashew_butter

After making some bomb almond butter (#nerd) and delicious peanut butter, it was time for the big dog: CASHEW BUTTER.

This started out as one-ingredient cashew butter, but as the butter was “churning” in my food processor, the evil genius in me came out and I felt compelled to elevate the butta’ with, what else but unsweetened shredded coconut. Because coconut is delicious and full of healthy fat (yes, saturated fats can be healthy too). And because I’ve been wanting coconut in everything lately.

Whatever you do, please, pleeaasseee don’t be intimidated by “homemade nut butter” — it’s super-easy and while it takes about 10 minutes to get all dreamy and creamy, it only takes about 2 minutes of hands-on time and the flavor combinations are endless. Add some cinnamon, smoked sea salt, ginger or go savory with paprika, curry or rosemary. This is your nut butter party and you’ll add what you want to.

Toasted Coconut Cashew Butter

This really is amazing straight out of the jar, but is also fantastic drizzled over Greek yogurt, as a dip for fruit (pears are especially delicious) or as part of the most insane-good cashew butter and jelly sandwich known to man.

Ingredients:

  • 16 oz. raw, unsalted cashews
  • 1/2 cup unsweetened shredded coconut
  • 1 tsp. sea salt

Directions:

  1. Preheat oven to 375 degrees. Lay cashews on a baking sheet and toast for about 10 minutes, or until fragrant. toasted_coconut_cashew_butter
  2. Let cashews cool for about 15 minutes (or longer) — they get hot in the food processor so the cooler they are, the better.
  3. Add to food processor and process for about 10 minutes, or until it forms a creamy butter. See stages of nut butter chart below.
  4. Once cashews form a creamy butter, add coconut and sea salt and process another 2-3 minutes.

stages_nut_butter

STAGES OF NUT BUTTER

  1. Intact Nuts
  2. Nut Meal/Flour
  3. Giant blob of nut butter (it helps to smash this apart a couple times)
  4. Creamy, dreamy nut butter

Check out more amazing homemade creations from the talented Recipe ReDuxers by clicking the icon below. Enjoy!

Goat Cheese, Dried Plum and Rosemary-Stuffed Chicken Thighs with Sautéed Hazelnut Vegetables

By posting this recipe I am entering a recipe contest sponsored by California Dried Plum Board and am eligible to win prizes associated with the contest. I was not compensated for my time.

Happy May, everyone! May is a beautiful month — flowers blooming, temperatures heating up, my birthday…(#justsayin).

Before the weather gets too warm to use the oven, I have been trying to cram in all the delicious roasted meats and vegetables I can. And delicious they are.

Stuffed chicken is always tasty, but for whatever reason, I find myself making my stand-by of baked chicken with BBQ or teriyaki sauce most of the time. Maybe stuffed chicken, meat, etc. just seems more complicated (even though it’s not), which also makes it look all-the-more impressive when you do break out a recipe like this one.

goat cheese_dried plum_rosemary_chicken

I owe the inspiration for this recipe to the California Dried Plum Board, who tasked us Recipe ReDuxers with developing creative ways to use dried plums — formerly known as prunes — in everyday cooking.

Besides May being my birth month, it’s also National Osteoporosis Month, something that we all should care about. I think so many times, we forget about bone health, but it is so crucial to health, especially as we age. Strength training and other weight-bearing activities can have a huge positive impact on bone health, not to mention overall health. Food is also important — and not just dairy! Enter, dried plums.

Emerging research shows that eating dried plums may have positive effects on bone health. Previous studies discovered that eating 100 grams (two servings; about 8- 10 dried plums) of dried plums for one year was associated with increased bone mineral density (BMD) and improved indices of bone turnover in postmenopausal women. Another study indicated that one serving of dried plums may be as effective in preventing bone loss in older, osteopenic postmenopausal women. You can read more about dried plums and bone health here.

BUT, as well all know, if we don’t enjoy the food being recommended, then we probably won’t eat it.

Fortunately, this is not a concern with dried plums, because they are DELICIOUS and super-verstile in the kitchen. I prefer to use mine in a savory way, as seen here.

I’ve also been trying to cut down on and eventually eliminate added sugars from my diet, so I was thrilled to know that dried plums can be pureed and used as a replacement for refined sugar in recipes. Dried plums are naturally sweet but not as cloyingly sweet as straight sugar, which is a major win in my book. No need for uber-sweet desserts here, folks.

goat cheese_dried plum_chicken

Goat Cheese, Dried Plum and Rosemary-Stuffed Chicken Thighs with Sautéed Hazelnut Vegetables

You can choose to make just the chicken and pair it with another side, but the combination of the vegetables with hazelnuts and this chicken is scrumptious. Feel free to change up the vegetables used if you’d like — sautéed kale and other greens would pair also pair nicely.

Ingredients:

Stuffed Chicken

  • 1.5 lb. boneless, skinless, chicken thighs, pounded
  • 3/4 cup California Dried Plums, puréed or finely mashed
  • 1/4 cup goat cheese
  • 1 Tbsp. dried rosemary
  • 2 Tbsp. balsamic vinegar
  • 1/4 tsp. sea salt

Vegetable/Hazelnut Sauté

  • 1 Tbsp. olive oil, preferably cold-pressed
  • 2 cups spinach or other leafy green
  • 1/2 white onion, sliced
  • 2 cups carrots, thinly sliced into ribbons (you can also use a peeler to get this effect)
  • 2 Tbsp. balsamic vinegar
  • 1/4 tsp. sea salt
  • 1/2 cup hazelnuts

Directions:

  1. Preheat oven to 375 degrees. Lay hazelnuts on a baking sheet and toast for about 10 minutes, until fragrant. Set aside to cool.
  2. Using a fork, mash California Dried Plums, goat cheese and rosemary together. Lay pounded chicken thighs on a baking sheet and evenly distribute goat cheese and dried plum mixture onto half of chicken thigh. Fold the other half of the chicken thigh over the mixture. If this sounds confusing, imagine the filling as a hot dog and the chicken as the bun.
  3. Brush the stuffed chicken with 1 Tbsp. balsamic vinegar and sprinkle with 1/4 tsp. sea salt. Bake for about 45 minutes, or until the chicken reaches a temperature of 165 degrees. About 30 minutes in, brush with remaining balsamic vinegar.
  4. Meanwhile, while the chicken is baking, heat olive oil in a large skillet for 1-2 minutes, then add onions and saute for 2-3 minutes. Next, add the carrots and saute about 10 minutes, or until desired doneness. Add in the spinach and cook for 1-2 minutes, until just wilted. Turn stove off then add balsamic vinegar and sea salt and toss.
  5. Chop cooled toasted hazelnuts. Sprinkle over vegetables.

To see more ways in which Recipe ReDuxers use naturally sweet, convenient and nutrient-dense California Dried Plums, check out the link below.

6-Ingredient Miso Honey Roasted Chickpeas {Recipe ReDux}

Do you ever rummage through your fridge or pantry and think, ‘I really have to use up x before it goes bad’? It could be a random spice at the back of your spice cabinet, a condiment on your fridge door, a special kind of grain you only needed once (hello, arborio rice!), etc. Well, it’s spring which means it’s spring cleaning time! And spring cleaning should definitely involve food items too — which is why we’ve been tasked with doing just that for this month’s Recipe ReDux:

Spring cleaning: Go through your pantry, cupboards, freezer, or fridge; what ‘treasures’ have you found? Pick an ingredient/spice/condiment that’s been hanging out for a while and give it the attention it needs. Share a healthy recipe made using your new-found pantry prize.

Roasted_Miso_chickpeas

I had almost too much inspiration this month so I decided to combine two neglected ingredients into this recipe, which I have to give myself kudos for since this recipe only involves six ingredients total (for all you math nerds, that means 1/3 of the ingredients).

The first: chickpeas. I pretty much always have either canned or dried chickpeas — AKA garbanzo beans — in my pantry. For the most part, I end up hummus-izing them (yep, I just invented a new word). But then I found miso hanging in the fridge and thought, ‘hey, these could go together’.

Miso has such an amazing, umami flavor and adds a really interesting depth to recipes. I personally like to hit as many different taste buds with my recipes as possible, so added some sea salt, honey and citrus (lemon) to round things out.

This recipe’s beauty comes not just from its taste but also from its simple ingredient list and very hands-off preparation. Hope you enjoy!

miso_honey_roasted_garbanzo_beans

Miso Honey Roasted Chickpeas

These roasted chickpeas get super crunchy — almost like nuts or croutons — and make a great topping for salads and stir fries and are equally as delicious on their own!

miso_honey_garbanzos

Ingredients:

  • 2 cans chickpeas (about 4 cups), preferably organic, no salt added
  • 2 Tbsp. Miso (use a soy-free, chickpea-based version like the one pictured above if you want to go soy-free)
  • 2 Tbsp. olive oil, preferably unfiltered, cold-pressed
  • 2 Tbsp. lemon juice
  • 1 1/2 Tbsp. honey
  • 1/2 tsp sea salt

Directions:

  1. Preheat oven to 425. Add miso, olive oil, lemon juice and honey to a bowl and whisk until well combined.
  2. Add chickpeas to the miso mixture and toss to coat. Lay on a baking sheet and sprinkle with sea salt.
  3. Roast for 30-40 minutes or until chickpeas are crunchy. (I like mine nice and charred as you can see from the photos). Note: the chickpeas will continue to harden after you take them out of the oven.

Warning: these are extremely addicting so try to control yourself when they come out of the oven. If you can’t, though — no worries. They’re not exactly junk food. 😉

To find out how other Recipe ReDuxers use buried food “treasures,” click the link below. Happy eating!

Homemade Nutella {Recipe ReDux}

It doesn’t have to be Valentine’s Day for me to want chocolate.

In fact, every day is a chocolate day. Just like I need coffee every morning, I enjoy a square of dark chocolate every night. It goes really well with the red wine that I drink every night, but that’s a different blog post. [insert red wine emoji here]

clean nutella

Even though Valentine’s Day has passed, that doesn’t mean I can’t be smitten with the ladies behind Recipe ReDux. They clearly know the way to my heart with this month’s theme — CHOCOLATE!

Favorite Chocolate Matches
Does your chocolate need a friend? This month’s posting will be after Valentine’s Day, so you may have a bit of extra chocolate around. What’s your favorite chocolate match? Be it traditional peanut butter or something more exotic like cayenne + chocolate. Show us your favorite healthy chocolate combo recipe.

I do love cinnamon + chocolate + cayenne à la Mexican Hot Chocolate and will gobble up pretty much anything with chocolate and peanut butter.

homemade nutella

But once Nutella comes into the picture, ALL BETS ARE OFF.

Nutella is like candy, though. In fact, the first — AKA main — ingredient in brand-name Nutella is sugar, then palm oil.

nutella_ingredients

No thanks.

I’ve been wanting to make my own Nutella using REAL ingredients, and this seemed like a sign from the gods that now was the time.

This Chocolate Hazelnut spread’s number one ingredient is………..

DSCN0707

HAZELNUTS! Then comes chocolate. Who would guess that the first two ingredients in a chocolate-hazelnut spread are hazelnuts and chocolate?

Well, now you can feel a little better about smothering this stuff on everything — or just eating straight, which is my preferred method of ingestion. This “Nutella” contains only 7 ingredients, is a clean recipe, contains only 2 Tbsp. of maple syrup as a sweetener and is super-chocolately thanks to 72% dark chocolate.

Homemade Nutella {paleo, gluten-free}

You’ll think that the hazelnut “powder” will never turn into a smooth, dreamy hazelnut butter, but have patience young grasshopper and stand and watch as it slowly becomes smoother and creamier.

Ingredients:

  • 2 cups hazelnuts
  • 3.5 oz. dark chocolate (70% or higher is best)
  • 1/2 cup coconut milk (the one in the carton, not the can)
  • 1/4 cup dutch cocoa powder
  • 2 Tbsp. virgin coconut oil
  • 2 Tbsp. maple syrup (or more if you want it a little sweeter)
  • 1/2 tsp. sea salt

Directions:

  1. Preheat oven to 375. Toast hazelnuts for 10-15 minutes, until they are fragrant and start to look toasty.
  2. Wet a large cloth and pour toasted hazelnuts on top of the cloth. Fold the cloth over and keep rubbing until most of the hazelnut skins have come off (don’t worry if you feel like there’s still a lot on — I did too and my Nutella still turned out super smooth and creamy)
  3. Add toasted, skinned hazelnuts to food processer and process for about 10 minutes, until “butter” forms.DSCN0709
  4. While hazelnut butter is forming, melt dark chocolate in the microwave.
  5. Add melted dark chocolate and remaining ingredients and process until well-blended.

DSCN0710

Enjoy with bananas, apple slices or straight out of the jar. I’m not a big bread-eater, but if that’s your thing, this would be delicious spread on toasted bread.

paleo nutella

For more chocolatey deliciousness, follow the link below.

Coconut Curry Beet and Butternut Squash Soup with Cilantro-Lime Pesto {Vegan}

Because you know I’m all about that beet, bout that beet, with pesto. I’m all about that beet, bout that beet, with pesto. I’m all about that beet, bout that beet, with pesto. I’m all about that beet, bout that beet, with pesto. Hey!

I’m bringing beet soup baaaaacccckkk!

I could totally continue on with my Meghan Trainor/beet soup song, but I have an important recipe that needs sharing. For soup, no less. And while this soup is totally about the beets, it’s also about the butternut squash, coconut, curry and THE PESTO. [Vegan] Cilantro Lime Pesto that I posted yesterday. The combination of that pesto and this soup is money.

coconut_curry_butternut_squash_beet_soup_vegan

Who calls a soup + pesto combination “money”? I called a sandwich “money” the other day while out to eat with the boy, who proceeded to tease me about using the phrase to describe food.

I guess that’s just how I roll.

Okay, back to soup.

I’m not generally a soup maker. I make big batches of chili all the time but for some reason I’ve neglected soup.

I think it’s because, until now, I didn’t appreciate the beauty of soup. Soup is a fantastic way to use up ingredients — produce, proteins, etc. — that are on the verge of going bad. While soups can take a little longer to prepare, they yield a giant pot of deliciousness that can then feed you for days. Soups also let you play around with flavor combinations and can be relatively fool-proof.

The curry-coconut-cilantro combo (with beets + butternut squash) is seriously delicious. The richness from the coconut is perfectly balanced by the acidity and freshness of the Cilantro Lime Pesto.

And while I’m not a vegan, the vegan principle of using real, whole ingredients is one that I totally get behind. If you haven’t noticed, I don’t really do processed foods.

coconut_curry_beet_squash_soup_vegan

Coconut Curry Beet and Butternut Squash Soup with Cilantro Lime Pesto

This soup would be perfect to serve at parties, for the holidays or just make whenever you want a warming, delicious and satisfying meal. If you’re not a vegan, I suggest pairing this with a grilled chicken breast for some protein.

Servings: 6, 10 oz. cups

Ingredients:

  • 1 large butternut squash
  • 2 large, fresh beets
  • 1 can (13.6 oz.) light coconut milk + 1 can (13.6 oz.) water
  • 1 1/2 tsp. curry powder
  • 1 tsp. salt
  • 1 tsp. black pepper
  • 1 tsp. chili powder (optional)
  • Cilantro Lime Pesto for topping

Directions:

  1. Preheat oven to 375 degrees.
  2. Cut butternut squash in quarters. Cut the ends off (the little nub at the top and tough part at the bottom). Scoop out the seeds (save these for delicious roasted squash seeds if you feel inclined).
  3. Wash/scrub beets well. Cut off top and bottom of each beet, then cut into quarters. No need to peel the beets — just make sure you scrub them well.
  4. Lay butternut squash, cut side down, and beets on a sheet pan and roast for about an hour, until they are soft. Peel the skin of the butternut squash off (it should easily come off). Let the squash and beets cool slightly.
  5. When beets and squash slightly cooled, add to a food processor and pulse mixture until smooth.
  6. Add blended mixture to a large pot, along with coconut milk, water, curry powder, salt, pepper and optional chili powder.
  7. Heat over medium until mixture starts to boil, then turn heat to low and simmer for at least 30 minutes.
  8. Top each serving with a spoonful of cilantro pesto and serve warm.

vegan_beet_squash_soup_with_pesto

Five-Minute Cilantro Lime Pesto {Vegan}

My memories of pesto go back to being a kid, when my mom grew basil in the herb garden and would make big batches of amazing pesto throughout the summer. Have you ever frozen extra pesto (or any sauce for that matter) in ice cube trays? My mom would do this and it’s brilliant — you can just pop out a cube anytime you need some pesto in your life.

Which is often.

vegan_cilantro_lime_pesto

Since getting the best gift ever — AKA my food processor — I have been known to make pesto out of any and everything. So, when I had some leftover cilantro from these Southwestern Sweet Potato Romaine Wraps with Cabot Pepper Jack Cheese, I made the obvious decision.

The only problem was that I didn’t have enough left to make full-blown cilantro pesto. Then I realized I had baby spinach in the fridge, and I could use it to extend the cilantro. And life was good again.

SIDE NOTE: I always have a giant box of organic spinach (I use Earthbound Organic) in my fridge and I recommend you do the same. I add it to eggs, use it as a salad base, add it to smoothies, soups and stir-fries, and more. It’s a great way to amp up the nutrition of your food and I find that the spinach in the plastic “boxes” stays fresh much longer than the kind packaged in bags.

Admittedly, this pesto was made to be a topper to a Coconut Curry Butternut Squash & Beet Soup that I’ll be posting later this week — I know, such a tease — but it is seriously delicious and can stand completely on it’s own. As in, I’ve been eating pesto by the spoonful. I’m not ashamed, though. You totally would do it too.

Vegan Cilantro Lime Pesto

Mix this in with eggs, add vinegar and serve as a dressing, use as a dip for veggies, eat it plain OR drizzle it over the Coconut Curry Butternut Squash & Beet Soup recipe I’ll be posting in a few days.

cilanro_lime_pesto_vegan

Ingredients:

  • 1 cup fresh cilantro
  • 3 cups fresh spinach (such as Earthbound Organic)
  • 3/4 cup walnuts (raw or roasted, whatever you fancy)
  • 1/3 cup grapeseed or olive oil
  • Juice of 1 1/2 limes
  • 2 tsp. lime zest (about 1/2 a lime worth)
  • 1 tsp. salt
  • 1 tsp. garlic powder
  • 1 tsp. lemon peper (or ground black pepper)

vegan_cilantro_pesto_lime

Directions:

  1. Wash cilantro and remove last 2″ of the stems (you can keep some of the stems on — they’ll all get ground up anyway)
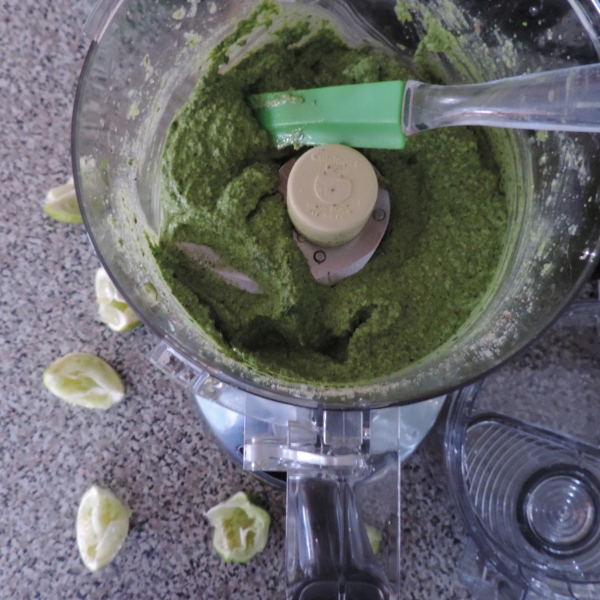
  2. Add cilantro and remaining ingredients to a food processor. Process until smooth.

vegan_cilantro_lime_pesto

This Thursday, I’ll be posting the most perfect, six-ingredient vegan soup recipe that is even better when topped with Cilantro Lime Pesto. Get ready, kids.

Southwestern Sweet Potato Romaine Wraps with Cabot Pepper Jack Cheese {Sponsored Recipe ReDux}

I received free samples of Cabot Cheese mentioned in this post. By posting this recipe I am entering a recipe challenge sponsored by Cabot Creamery and am eligible to win prizes. I was not additionally compensated for my time.

I’ve learned throughout the years that one can never have too much cheese. Cheese adds creaminess, gooiness and deliciousness — and also can elevate a dish and make it so much more satisfying.

I should probably write a love song about cheese, but I’ll spare you for now.

Cabot Cheeses are a personal favorite. Because their cheddars are aged, they are naturally lactose-free. More importantly, they give 100% of profits back to the 1,200 dairy farm families that make up their co-op. While browsing their website, I also came across the story of Barstow’s Longview Farm, who actually use their cows’ waste to create enough energy to power their farm AND churn Cabot butter. Awesome! Truly making lemonade out of lemons (aren’t you glad I went with that analogy over others?).

Southwestern_Romaine_Wraps_Cabot_Pepper_Jack

When Cabot tasked us Recipe ReDuxers with creating healthier appetizers fit for Super Bowl and awards show parties — and provided us with LOTS and LOTS of cheese samples — I came up with an infinite list of recipe ideas.

I love apples and cheese, so first I went sweet with my Loaded Apple Cheddar Nachos using Cabot’s Farmers’ Legacy Collection Alpine Cheddar. After making those, all I wanted to do was make more apple-cheddar recipes. Those nachos were seriously delicious.

I was able to control that urge, however, and come up with an equally delicious savory appetizer that combines perfectly-spicy Cabot Pepper Jack cheese with sweet potatoes, black beans, red onions and cilantro to make a fresh and healthy side dish.

Southwestern Sweet Potato Romaine Wraps with Cabot Pepper Jack Cheese

These are the perfect appetizer for game day parties or for a tasty snack. Add chicken or crumble tofu into the sweet potato and black bean mixture to create a full meal. If you like things extra spicy, chili powder would be a delicious addition.

Serves 4 (2 romaine wraps/person)

Ingredients:

  • 1 Tbsp. olive oil
  • 1/2 medium red onion, finely chopped
  • 1 large sweet potato, diced into small cubes
  • 1 cup black beans (if using canned, go with a No Salt Added variety)
  • 1 tsp. cumin
  • 1 tsp. paprika
  • 1 tsp. salt
  • 1/2 tsp. black pepper
  • Romaine hearts, washed with leaves separated (8 leaves total)
  • 4 oz. Cabot Pepper Jack cheese, shredded
  • 1/2 cup chopped fresh cilantro

Directions:

  1. Heat olive oil in a large saute pan. Add red onion and cook for 3-5 minutes. Add diced sweet potatoes and cook until sweet potatoes are tender, about 15-20 minutes. Add in the black beans, cumin, paprika, salt and black pepper and cook for 1-2 minutes.
  2. While mixture is cooking, turn oven onto broil.
  3. Lay romaine leaves on a baking sheet and spoon 2-3 Tbsp. of the sweet potato and black bean mixture into each leaf. Top evenly with shredded Cabot Pepper Jack (1/2 ounce per leaf).
  4. Broil for 1-3 minutes, until cheese is melted.
  5. Sprinkle with cilantro and serve warm.

Southwestern_Romaine_Bites_Cabot_Pepper_Jack

See what other delicious Cabot cheese creations Recipe ReDuxers have created by clicking on the link below!

Loaded Cheddar Apple Nachos {Sponsored Recipe ReDux}

I received free samples of Cabot Cheese mentioned in this post. By posting this recipe I am entering a recipe challenge sponsored by Cabot Creamery and am eligible to win prizes. I was not additionally compensated for my time.

Wowza. When Cabot Creamery tasked us with creating a lightened-up appetizer fit for game day and red carpet parties, I never dreamed that I’d create something as delicious as these Loaded Cheddar Apple Nachos. But I did guys, and I would love nothing more than to share the recipe with you.

It all started when two packages filled with Cabot cheese arrived at my doorstep…so basically the best gift you could ever receive. At first I was a little overwhelmed with all the cheese, but then I snapped back to reality and realized that there is no such thing as too much cheese. It was time to create a delicious recipe.

loaded_cheddar_apple_nachos

It’s all about the cheddar here, guys. I fell in love with Cabot’s Legacy Collection Alpine Cheddar. To me, it’s almost reminiscent of an aged Parmesan.

I also learned that Cabot’s cheddar cheeses are naturally lactose-free (can’t wait to tell all my lactose intolerance clients and friends)!

Even more awesome is the fact that Cabot Creamery is a family-farmer owned cooperative of more than 1,200 farms located throughout New England and New York. One-hundred percent of Cabot’s profits go back to their farmers. Can’t ask for anything better than that!

cabot_cheddar_cheese

I really do have to pat myself on the back for this recipe. It combines sweet and savory, lots of texture from the toppings and is warm and gooey and perfect for game-day parties. I hope you enjoy!

Loaded Cheddar Apple Nachos

Servings: 2-3

If you don’t have walnuts, use almonds or pecans. Don’t like cranberries? Try tart cherries or raisins. Drizzle with honey or maple syrup if you’re avoiding grain sugar. I used the ever-so-fast microwave method to make the apple chips, but if you’d rather bake them, you can cook each side in a 200 degree oven for about 1-1.5 hours.

loaded_cheddar_apple_nachos_baked

Ingredients:

  • 4-5 medium apples, such as Gala or Honey Crisp
  • 2 oz. Cabot Farmers’ Legacy Collection Alpine Cheddar, grated
  • 1/3 cup dried cranberries
  • 1/4 cup crushed walnuts
  • 1 heaping Tbsp. brown sugar, packed
  • 1/4 tsp. cinnamon

loaded_cheddar_apple_nachos_ingredients

Directions:

  1. Preheat oven to 350 degrees.
  2. Slice apples thinly using a mandolin or sharp knife. They look prettiest when you slice horizontally, though they are harder to control, so feel free to slice vertically if that’s easier. Don’t worry if you don’t get a perfect slice — slivers work just as well here.
  3. Line a large, microwave-safe plate with parchment paper. Working in rounds, lay apples on parchment paper in a single layer. Microwave for 3-4 minutes, or until edges of apples start to curl. Flip slices over and microwave another 1-2 minutes. Lay apples out on a parchment paper-lined baking sheet and let sit. They will start to harden the longer they sit. Make sure to keep a close eye on the apples to ensure they’re not burning (ruined a few slices this way).
  4. Once all the apples are “chip-ified,” arrange them on the parchment-lined baking so that they overlap slightly. Sprinkle with cranberries, walnuts, cinnamon, sugar and then finish with grated Cabot Alpine Cheddar.
  5. Bake for 10-15 minutes, until cheese is melted and slightly toasted.

loaded_apple_nachos_unbaked

loaded_apple_nachos_baked

With all that cheese awaiting me in the fridge, there are bound to be more recipes coming. In the meantime, check out other Recipe ReDuxers’ Cabot cheese creations:

Toasted Maple and Smoked Sea Salt Almonds {Recipe ReDux}

Smoking is so in right now. It seems like everybody’s doing it — from young to old.

……………………..

No, silly — I’m talking about SMOKED FOODS. There are herbs and spices, sea salts, proteins, vegetables, butters and even cocktails that use smokiness to lend a unique and deep flavor to foods and drinks. I have been a fan of smoky foods for some time now (I know, I’m like SO ahead of the trends!) and was thrilled when I found out the theme for this month’s Recipe ReDux, “Start Smoking in the New Year:”

The New Year is heating up with smoke and spiciness. From boldly flavored smoked salts to actual smoking techniques, subtly smoked food is on-trend. The same can be said for spice as we savor heat from harissa, sriracha and smoked paprika. Show us the healthy dish you’re heating up with smoke and/or spiciness.maple_smoked_salt_almonds

I contemplated trying to create a small home smoker for a hot minute but decided my tiny, poorly ventilated kitchen would probably not be the best environment for said cooking technique.

I do love smoked paprika, but I thought I’d use something that isn’t already part of my cooking repertoire: SMOKED SEA SALT. This stuff is amazing and truly elevates any recipe, turning it into a sultry, smoky, savory, seductive dish of the gods.

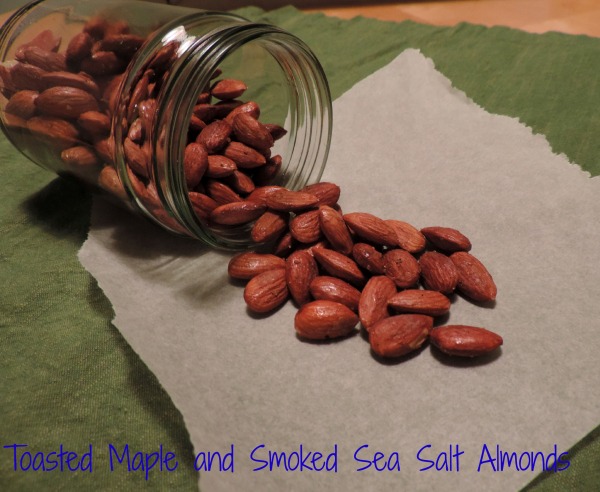
And who doesn’t love a salty-sweet combo? Add smoky into the mix and it’s divine. Thus, I bring you Toasted Maple and Smoked Sea Salt Almonds. These contain five ingredients and come together in less than 20 minutes. Just watch yourself — they are seriously addicting.

Toasted Maple and Smoked Sea Salt Almonds

These almonds make a great snack, or try them sprinkled on a salad with dried fruit. If you want even more flavor, these would be great with chili powder, dried rosemary, curry and/or cumin added to the mix.

maple_salted_almonds

Ingredients:

  • 1 lb. raw almonds
  • 2 Tbsp. egg whites
  • 2 Tbsp. pure maple syrup
  • 1 Tbsp. brown sugar
  • 1 tsp. smoked sea salt

maple_smoked_salt_almonds_ingredients

Directions:

  1. Preheat oven to 350
  2. Add almonds, egg whites, maple syrup and smoked sea salt to a large bowl. Toss to coat almonds in the mixture
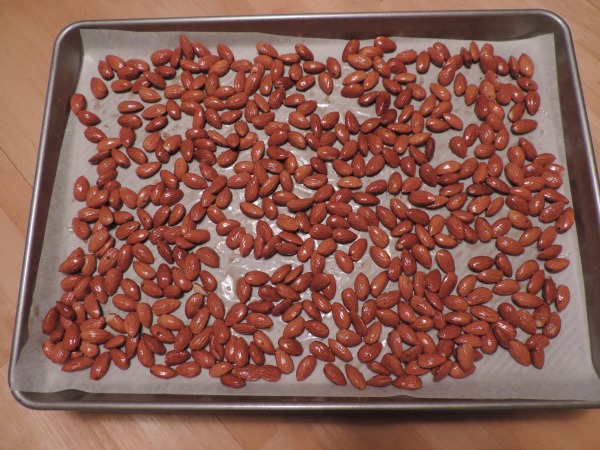
  3. Spread on a baking sheet lined with parchment paper and sprinkle with brown sugar
  4. Bake for 5 minutes, then toss the almonds and bake for another 5-10 minutes, until toasted

raw_maple_salted_almondstoasted_maple_salted_almonds

For more “smoky” recipe inspiration from fellow Recipe ReDuxers, click on the link below!

Holiday Salad with Pecan and California Raisin-Crusted Goat Cheese {Sponsored Recipe ReDux}

By posting this recipe I am entering a recipe contest sponsored by the California Raisin Marketing Board and am eligible to win prizes associated with the contest. I was not compensated for my time.

The holidays are certainly upon us. I’m not sure about you all, but we have holiday parties/festivities for the next several weekends (not that I’m complaining). That means lots of food, and most of it not very healthful.

My general plan of attack for myself (and what I recommend to clients) is to bring a couple dishes that you have prepared and feel good about eating. That way, when you’re surrounded by marshmallow and sugar-laden sweet potato casseroles, creamy vegetable sides and indulgent desserts galore, you at least can at least eat/feel good about eating the dishes you brought (and maybe skip some of those disgusting creamy casseroles).

brussels_butternutsquash_raisins_goatcheese1

For the holidays, my go-to dish is a salad. It’s the dish I volunteer to make for all my holiday parties, partially because I don’t trust others to make a good salad — I’m a control freak and I’ve never denied that — and partially because I make a damn good salad.

So when the folks at California Raisins tasked us with creating recipes that are “naturally sweet for the holidays,” my mind went to salad.

When making a salad, I love taking seasonal vegetables and adding just a touch of sweetness, whether that’s a honey-infused vinaigrette, raisins, or both, as I’ve done here. California Raisins add natural sweetness with zero fat, no cholesterol and no added sugar. Plus, they offer 9% your daily fiber and potassium, and 6% of your daily iron.

brussels_butternutsquash_raisins_goatcheese

They’re a great choice for wholesome at-home or on-the-go snacking, plus they lend themselves well to both savory and sweet applications, where they provide natural sweetness.

They are seriously amazing for snacking, though, as evidenced by the fact that my roommate and I snacked on a pretty portion of the bag of California Raisins before I even started to create my recipes, to the point where I had to go back to the store to get several more bags. No biggie though, because California Raisins are the most economical dried fruit, according to the USDA.

As a sidenote, I love to pop a few raisins with peanut or almond butter — ants-on-a-log sans the celery, if you will — and also add them to my plain Greek yogurt to add extra nutrition and a little natural sweetness.

They also were d.e.l.i.c.i.o.u.s. in my Vegan Moroccan Stew, which I made for another ReDux a few months ago.

Recipe: Raw Brussels Sprouts and Roasted Butternut Squash Salad with Pecan and California Raisin-Crusted Goat Cheese

This salad is perfect for the holidays and because the Brussels sprouts don’t wilt like other greens, you can actually prep and dress the salad up to 1-2 days ahead of time. California Raisins add a great sweet note to the salad and the goat cheese brings just the right amount of tang.

brussels_butternutsquash_raisins_goatcheese2

Ingredients:

  • 1 small butternut squash
  • 1 Tbsp. olive oil
  • 1 lb fresh Brussels sprouts
  • 3/4 cup California Raisins, divided (1/2 cup plus 1/4 cup)
  • 8 oz. log Chevre goat cheese, sliced into 1/2″ rounds
  • 1/4 cup finely chopped pecans
  • 1 tsp. dried rosemary
  • 3 Tbsp. balsamic vinegar
  • 2 Tbsp. olive oil
  • 1 Tbsp. honey
  • 1/2 tsp. black pepper
  • 1/4 tsp. salt

Directions:

  1. Peel butternut squash using a sharp knife then cut in half, lengthwise, and remove the seeds from the middle. Dice into small (~1/4″) cubes. Toss with 1 Tbsp. olive oil and lay on a baking sheet. Roast at 375 degrees for 30-45 minutes, or until the squash is soft.
  2. While the squash is cooking, cut/shred Brussels sprouts, then wash and thoroughly dry them (or use a salad spinner).
  3. Mix 1/4 cup California Raisins, pecans and rosemary and gently press mixture into both sides of the goat cheese slices.raisins_pecan_rosemary_goatcheese
  4. In a large bowl, add balsamic vinegar, 2 Tbsp. olive oil, honey, pepper and salt. Use a whisk to mix.honey_balsamic_dressing
  5. Add shredded Brussels sprouts, roasted butternut squash, and remaining 1/2 cup California Raisins and toss with dressing.          brussels_butternutsquash_honey_balsamic
  6. Top with pecan and California Raisin-crusted goat cheese.

To make it a meal, try adding grilled chicken, turkey or fried eggs, as I did for breakfast yesterday.

CARaisins_GoatCheese_Salad_witheggs

See how other Recipe ReDuxers are using California Raisins by clicking the link below.