Holiday Roasted Vegetable Salad

This roasted vegetable salad features beets, carrots and cauliflower tossed in a maple balsamic dressing with a toasty, nuttiness from pecans and a little sweetness from golden raisins. 
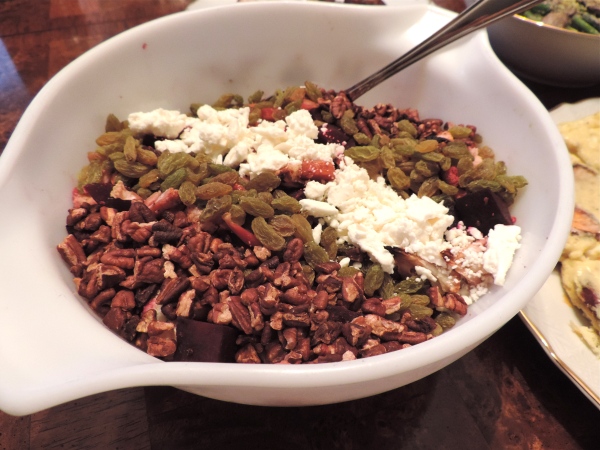
roasted_vegetable_salad

Happy Holidays, all! We’ve had an unseasonable winter thus far in Chicago. Last weekend it was 60 degrees, which I don’t think has ever happened in my lifetime.

Yes, I enjoy the warmer weather (this could be -40 degrees like the last couple years), but it’s a little disconcerting. It worries me about global warming, but more importantly, it makes it hard to get in the holiday spirit.

(I kid, I kid. Global warming is definitely > holiday spirit.)

But let’s focus on a problem I can immediately improve — holiday cheer! I’ve been doing everything I possibly can to make it feel like Christmas: decorating everything, Christmas-y smelling candles, Home Alone, Elf, Christmas tunes bumping…

What I really love about the holidays, though — and I think most people would agree — is getting to spend time with good friends and family and enjoying delicious food. So that’s what I’ve been trying to amp up.
holiday_table

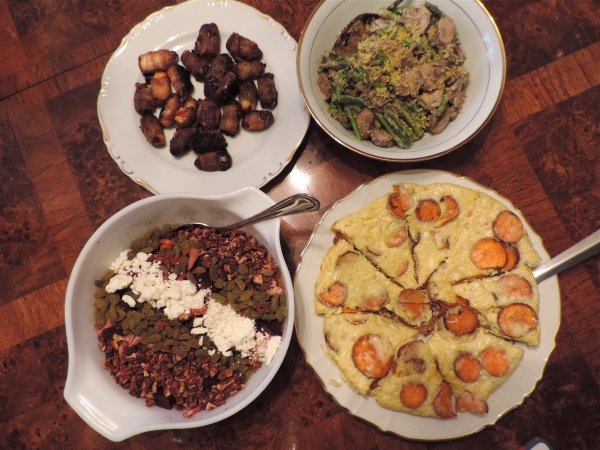
Last weekend I hosted some of my college girlfriends for a potluck + secret Santa exchange, a tradition we’ve had since we graduated. As the host, I decided to make a few items for the potluck:

Roasted Vegetable Salad (lettuce-free)

Lemon Tahini Vegetables

Sweet Potato Frittata

I’ll be posting the recipes throughout this week. I promise, they’re all very easy and can be done in part ahead of time. Hope you enjoy!

Roasted Vegetable Salad

Change out the standard lettuce-based salad for this one featuring roasted vegetables, toasted pecans and golden raisins. This would pair well with chicken or turkey, or would be fantastic over a bed of kale if you still want some greens in your salad.

Serves 10-12

Ingredients:

  • 4 large beets
  • 1 head cauliflower
  • roughly 10 carrots
  • 1 Tbsp. olive oil + 1 1/2 Tbsp. olive oil
  • 1/2 tsp salt
  • 2 Tbsp. balsamic vinegar
  • 1 Tbsp. maple syrup
  • 1 cup feta cheese (goat cheese would also be amazing)
  • 1 cup raw pecan pieces
  • 1 cup golden raisins

Directions:

Preheat oven to 425 degrees.

Wash all the vegetables well and lay on towels/paper towels to dry. Cut the ends off of the beets, peel them, and chop into 1/2″ cubes. Cut cauliflower in quarters and then cut Continue reading

Olive and Red Wine Hummus {Sponsored Recipe ReDux}

I am currently blogging from #BlogBrulee at beautiful Smuggler’s Notch Vermont. I’m only half a day in and already I feel like I’ve learned so much and met the most amazing, inspiring bloggers. More on that to come – or if you can’t wait, check out my last post, which explains all about the awesomeness that is Blog Brulee.

I owe my ability to even go to Blog Brûlée to Recipe ReDux, which not only gives me creative recipe ideas every month and allows me to connect with fellow Recipe ReDuxers; it also means I get introduced to awesome foods/food brands/commodity boards like California Ripe Olives. They’ve challenged us ReDuxers to utilize and highlight California Ripe Olives in a unique and tasty recipe that also includes other flavors represented in the Mediterranean Diet e.g. vegetables, legumes, nuts, fish/seafood and more.

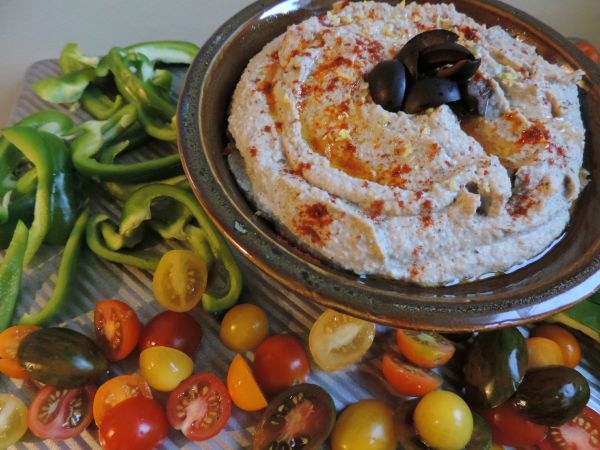
olive_hummus_with_wine

I received free samples of California Ripe Olives mentioned in this post. By posting this recipe I am entering a recipe contest sponsored by California Ripe Olives and am eligible to win prizes associated with the contest. I was not compensated for my time.

 If you haven’t gathered from my blog/social media food posts (which make up about 99% of my posts), I am a HUGE fan of Mediterranean foods, and being half Armenian, grew up eating the best.

My favorite Mediterranean food – hell, my favorite food period – is hummus. Hummus has the perfect blend of lemony-garlicky-olivey flavor that works just as well as a dip, spread, condiment or to eat with a spoon (guilty). Beyond the deliciousness, hummus provides great nutrition. My clients often think that hummus is “fattening.” Grrrrrr, the “fattening” comment AKA one of my dietitian pet peeves.

[Stepping on soapbox] First off, foods that contain fats, specifically the good ones – monounsaturated, omega-3s, etc. – do not make you fat. In fact, those fats bring down inflammation in your body, which can make you feel better and also decrease your risk for various health issues such as diabetes, heart disease and inflammatory issues like rheumatoid arthritis and IBS.

Second, let’s compare hummus to other condiments such as BBQ sauce, ketchup, premade salad dressings and all the other junk. Hummus generally contains whole, real ingredients, barely any sugar and not much sodium. It is an infinitely better condiment than the other aforementioned sauces, which are generally LOADED with salt, sugar/high-fructose corn syrup, weird oils, preservatives and more. [Stepping off soapbox]

Okay, back to my love affair with hummus and also my love for olives, which I’m not sure I’ve mentioned yet but which is real and true.

Olives are an essential part of the Mediterranean diet and contain monounsaturated fat (1.5 grams per 4-olive serving) – the good fat, as we’ve discussed. California Black Ripe Olives are as nutrient-loaded as they are tasty. They contain vitamin E (0.25 mg per serving), iron, (0.49 mg per serving), vitamin A (60 IU per serving) and fiber (0.5 grams per serving). California Ripe Olives are extremely versatile in the pantry.
Since I love hummus already, I figured why not pump up the olive flavor with California Ripe Olives? Oh, did I mention there’s also red wine thrown in the mix? Because sometimes when you’re making California Ripe Olive Hummus and drinking red wine, you have crazy ideas like adding said wine to the hummus. And sometimes these ideas actually turn out great, as they did here. Cheers to that!

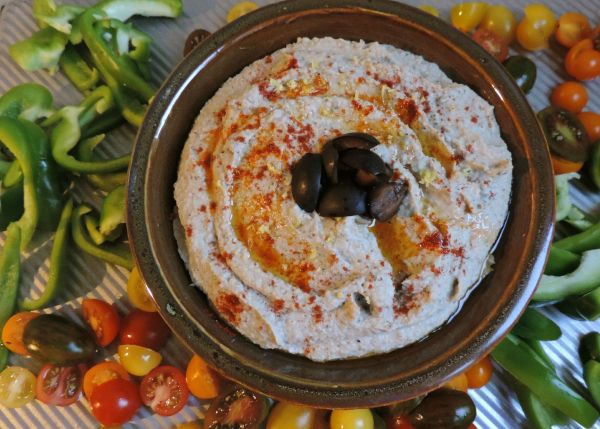
California Ripe Black Olive and Red Wine Hummus

Serve this savory, briney hummus with your favorite vegetables, cheeses and meats or enjoy it spread on a sandwich or “dilute it” with some oil and vinegar like I do to turn it into a salad dressing.

mediterranean_hummus 

Ingredients:

  • 2 (15 oz.) cans garbanzo beans, drained and well-rinsed
  • 1 can California Ripe Black Olives, drained, with 2-3 olive reserved
  • 1/3 cup tahini (sesame paste)
  • 1/3 cup olive oil plus 1 tsp.
  • 1/3 cup red wine
  • Juice of 1 lemon
  • ½ tsp cumin
  • ½ tsp black pepper
  • 1 tsp. sea salt

Directions:

  1. Add all ingredients, except for olive oil, to food processor and process until smooth.
  2. Drizzle olive oil through the feed tube and process until well-incorporated.
  3. Chop reserved olives and add to the top of the hummus as a garnish. Drizzle with 1 tsp. olive oil.

For more California Ripe Olive recipes, check out the link below.

Goat Cheese, Dried Plum and Rosemary-Stuffed Chicken Thighs with Sautéed Hazelnut Vegetables

By posting this recipe I am entering a recipe contest sponsored by California Dried Plum Board and am eligible to win prizes associated with the contest. I was not compensated for my time.

Happy May, everyone! May is a beautiful month — flowers blooming, temperatures heating up, my birthday…(#justsayin).

Before the weather gets too warm to use the oven, I have been trying to cram in all the delicious roasted meats and vegetables I can. And delicious they are.

Stuffed chicken is always tasty, but for whatever reason, I find myself making my stand-by of baked chicken with BBQ or teriyaki sauce most of the time. Maybe stuffed chicken, meat, etc. just seems more complicated (even though it’s not), which also makes it look all-the-more impressive when you do break out a recipe like this one.

goat cheese_dried plum_rosemary_chicken

I owe the inspiration for this recipe to the California Dried Plum Board, who tasked us Recipe ReDuxers with developing creative ways to use dried plums — formerly known as prunes — in everyday cooking.

Besides May being my birth month, it’s also National Osteoporosis Month, something that we all should care about. I think so many times, we forget about bone health, but it is so crucial to health, especially as we age. Strength training and other weight-bearing activities can have a huge positive impact on bone health, not to mention overall health. Food is also important — and not just dairy! Enter, dried plums.

Emerging research shows that eating dried plums may have positive effects on bone health. Previous studies discovered that eating 100 grams (two servings; about 8- 10 dried plums) of dried plums for one year was associated with increased bone mineral density (BMD) and improved indices of bone turnover in postmenopausal women. Another study indicated that one serving of dried plums may be as effective in preventing bone loss in older, osteopenic postmenopausal women. You can read more about dried plums and bone health here.

BUT, as well all know, if we don’t enjoy the food being recommended, then we probably won’t eat it.

Fortunately, this is not a concern with dried plums, because they are DELICIOUS and super-verstile in the kitchen. I prefer to use mine in a savory way, as seen here.

I’ve also been trying to cut down on and eventually eliminate added sugars from my diet, so I was thrilled to know that dried plums can be pureed and used as a replacement for refined sugar in recipes. Dried plums are naturally sweet but not as cloyingly sweet as straight sugar, which is a major win in my book. No need for uber-sweet desserts here, folks.

goat cheese_dried plum_chicken

Goat Cheese, Dried Plum and Rosemary-Stuffed Chicken Thighs with Sautéed Hazelnut Vegetables

You can choose to make just the chicken and pair it with another side, but the combination of the vegetables with hazelnuts and this chicken is scrumptious. Feel free to change up the vegetables used if you’d like — sautéed kale and other greens would pair also pair nicely.

Ingredients:

Stuffed Chicken

  • 1.5 lb. boneless, skinless, chicken thighs, pounded
  • 3/4 cup California Dried Plums, puréed or finely mashed
  • 1/4 cup goat cheese
  • 1 Tbsp. dried rosemary
  • 2 Tbsp. balsamic vinegar
  • 1/4 tsp. sea salt

Vegetable/Hazelnut Sauté

  • 1 Tbsp. olive oil, preferably cold-pressed
  • 2 cups spinach or other leafy green
  • 1/2 white onion, sliced
  • 2 cups carrots, thinly sliced into ribbons (you can also use a peeler to get this effect)
  • 2 Tbsp. balsamic vinegar
  • 1/4 tsp. sea salt
  • 1/2 cup hazelnuts

Directions:

  1. Preheat oven to 375 degrees. Lay hazelnuts on a baking sheet and toast for about 10 minutes, until fragrant. Set aside to cool.
  2. Using a fork, mash California Dried Plums, goat cheese and rosemary together. Lay pounded chicken thighs on a baking sheet and evenly distribute goat cheese and dried plum mixture onto half of chicken thigh. Fold the other half of the chicken thigh over the mixture. If this sounds confusing, imagine the filling as a hot dog and the chicken as the bun.
  3. Brush the stuffed chicken with 1 Tbsp. balsamic vinegar and sprinkle with 1/4 tsp. sea salt. Bake for about 45 minutes, or until the chicken reaches a temperature of 165 degrees. About 30 minutes in, brush with remaining balsamic vinegar.
  4. Meanwhile, while the chicken is baking, heat olive oil in a large skillet for 1-2 minutes, then add onions and saute for 2-3 minutes. Next, add the carrots and saute about 10 minutes, or until desired doneness. Add in the spinach and cook for 1-2 minutes, until just wilted. Turn stove off then add balsamic vinegar and sea salt and toss.
  5. Chop cooled toasted hazelnuts. Sprinkle over vegetables.

To see more ways in which Recipe ReDuxers use naturally sweet, convenient and nutrient-dense California Dried Plums, check out the link below.

Five-Minute Cilantro Lime Pesto {Vegan}

My memories of pesto go back to being a kid, when my mom grew basil in the herb garden and would make big batches of amazing pesto throughout the summer. Have you ever frozen extra pesto (or any sauce for that matter) in ice cube trays? My mom would do this and it’s brilliant — you can just pop out a cube anytime you need some pesto in your life.

Which is often.

vegan_cilantro_lime_pesto

Since getting the best gift ever — AKA my food processor — I have been known to make pesto out of any and everything. So, when I had some leftover cilantro from these Southwestern Sweet Potato Romaine Wraps with Cabot Pepper Jack Cheese, I made the obvious decision.

The only problem was that I didn’t have enough left to make full-blown cilantro pesto. Then I realized I had baby spinach in the fridge, and I could use it to extend the cilantro. And life was good again.

SIDE NOTE: I always have a giant box of organic spinach (I use Earthbound Organic) in my fridge and I recommend you do the same. I add it to eggs, use it as a salad base, add it to smoothies, soups and stir-fries, and more. It’s a great way to amp up the nutrition of your food and I find that the spinach in the plastic “boxes” stays fresh much longer than the kind packaged in bags.

Admittedly, this pesto was made to be a topper to a Coconut Curry Butternut Squash & Beet Soup that I’ll be posting later this week — I know, such a tease — but it is seriously delicious and can stand completely on it’s own. As in, I’ve been eating pesto by the spoonful. I’m not ashamed, though. You totally would do it too.

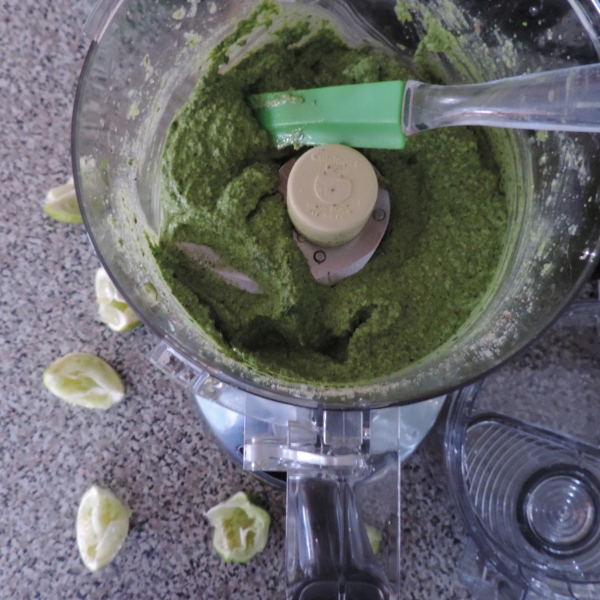
Vegan Cilantro Lime Pesto

Mix this in with eggs, add vinegar and serve as a dressing, use as a dip for veggies, eat it plain OR drizzle it over the Coconut Curry Butternut Squash & Beet Soup recipe I’ll be posting in a few days.

cilanro_lime_pesto_vegan

Ingredients:

  • 1 cup fresh cilantro
  • 3 cups fresh spinach (such as Earthbound Organic)
  • 3/4 cup walnuts (raw or roasted, whatever you fancy)
  • 1/3 cup grapeseed or olive oil
  • Juice of 1 1/2 limes
  • 2 tsp. lime zest (about 1/2 a lime worth)
  • 1 tsp. salt
  • 1 tsp. garlic powder
  • 1 tsp. lemon peper (or ground black pepper)

vegan_cilantro_pesto_lime

Directions:

  1. Wash cilantro and remove last 2″ of the stems (you can keep some of the stems on — they’ll all get ground up anyway)
  2. Add cilantro and remaining ingredients to a food processor. Process until smooth.

vegan_cilantro_lime_pesto

This Thursday, I’ll be posting the most perfect, six-ingredient vegan soup recipe that is even better when topped with Cilantro Lime Pesto. Get ready, kids.

Holiday Salad with Pecan and California Raisin-Crusted Goat Cheese {Sponsored Recipe ReDux}

By posting this recipe I am entering a recipe contest sponsored by the California Raisin Marketing Board and am eligible to win prizes associated with the contest. I was not compensated for my time.

The holidays are certainly upon us. I’m not sure about you all, but we have holiday parties/festivities for the next several weekends (not that I’m complaining). That means lots of food, and most of it not very healthful.

My general plan of attack for myself (and what I recommend to clients) is to bring a couple dishes that you have prepared and feel good about eating. That way, when you’re surrounded by marshmallow and sugar-laden sweet potato casseroles, creamy vegetable sides and indulgent desserts galore, you at least can at least eat/feel good about eating the dishes you brought (and maybe skip some of those disgusting creamy casseroles).

brussels_butternutsquash_raisins_goatcheese1

For the holidays, my go-to dish is a salad. It’s the dish I volunteer to make for all my holiday parties, partially because I don’t trust others to make a good salad — I’m a control freak and I’ve never denied that — and partially because I make a damn good salad.

So when the folks at California Raisins tasked us with creating recipes that are “naturally sweet for the holidays,” my mind went to salad.

When making a salad, I love taking seasonal vegetables and adding just a touch of sweetness, whether that’s a honey-infused vinaigrette, raisins, or both, as I’ve done here. California Raisins add natural sweetness with zero fat, no cholesterol and no added sugar. Plus, they offer 9% your daily fiber and potassium, and 6% of your daily iron.

brussels_butternutsquash_raisins_goatcheese

They’re a great choice for wholesome at-home or on-the-go snacking, plus they lend themselves well to both savory and sweet applications, where they provide natural sweetness.

They are seriously amazing for snacking, though, as evidenced by the fact that my roommate and I snacked on a pretty portion of the bag of California Raisins before I even started to create my recipes, to the point where I had to go back to the store to get several more bags. No biggie though, because California Raisins are the most economical dried fruit, according to the USDA.

As a sidenote, I love to pop a few raisins with peanut or almond butter — ants-on-a-log sans the celery, if you will — and also add them to my plain Greek yogurt to add extra nutrition and a little natural sweetness.

They also were d.e.l.i.c.i.o.u.s. in my Vegan Moroccan Stew, which I made for another ReDux a few months ago.

Recipe: Raw Brussels Sprouts and Roasted Butternut Squash Salad with Pecan and California Raisin-Crusted Goat Cheese

This salad is perfect for the holidays and because the Brussels sprouts don’t wilt like other greens, you can actually prep and dress the salad up to 1-2 days ahead of time. California Raisins add a great sweet note to the salad and the goat cheese brings just the right amount of tang.

brussels_butternutsquash_raisins_goatcheese2

Ingredients:

  • 1 small butternut squash
  • 1 Tbsp. olive oil
  • 1 lb fresh Brussels sprouts
  • 3/4 cup California Raisins, divided (1/2 cup plus 1/4 cup)
  • 8 oz. log Chevre goat cheese, sliced into 1/2″ rounds
  • 1/4 cup finely chopped pecans
  • 1 tsp. dried rosemary
  • 3 Tbsp. balsamic vinegar
  • 2 Tbsp. olive oil
  • 1 Tbsp. honey
  • 1/2 tsp. black pepper
  • 1/4 tsp. salt

Directions:

  1. Peel butternut squash using a sharp knife then cut in half, lengthwise, and remove the seeds from the middle. Dice into small (~1/4″) cubes. Toss with 1 Tbsp. olive oil and lay on a baking sheet. Roast at 375 degrees for 30-45 minutes, or until the squash is soft.
  2. While the squash is cooking, cut/shred Brussels sprouts, then wash and thoroughly dry them (or use a salad spinner).
  3. Mix 1/4 cup California Raisins, pecans and rosemary and gently press mixture into both sides of the goat cheese slices.raisins_pecan_rosemary_goatcheese
  4. In a large bowl, add balsamic vinegar, 2 Tbsp. olive oil, honey, pepper and salt. Use a whisk to mix.honey_balsamic_dressing
  5. Add shredded Brussels sprouts, roasted butternut squash, and remaining 1/2 cup California Raisins and toss with dressing.          brussels_butternutsquash_honey_balsamic
  6. Top with pecan and California Raisin-crusted goat cheese.

To make it a meal, try adding grilled chicken, turkey or fried eggs, as I did for breakfast yesterday.

CARaisins_GoatCheese_Salad_witheggs

See how other Recipe ReDuxers are using California Raisins by clicking the link below.

Quick and Easy Recipe: Warm Green Bean, Pomegranate and Sweet Potato Salad {Sponsored Recipe ReDux}

I received free samples of Libby’s new Vegetable Pouches mentioned in this post. By posting this recipe I am entering a recipe contest sponsored by Libby’s and am eligible to win prizes associated with the contest. I was not compensated for my time.

With the cooler weather, I’m craving all kinds of fall- and Thanksgiving-themed foods. But who has the time to cook all the squash, potatoes, beans and turkey? Not this girl.

I’m all about the quick, simple meal using quality ingredients — and culinary shortcuts — to yield tasty, good-for-you dishes. So when the folks at Libby’s Fruits & Vegetables challenged us to create delicious appetizers, soups, salads or side dishes in 10 minutes or less using Libby’s Vegetable Pouches as the hero ingredient, I was ready to get cooking.

warm_thanksgiving_salad

Libby’s Vegetable Pouches are pretty snazzy little things. They’re microwaveable (DONE IN ONE MINUTE!), which means fewer dishes for moi to clean (this whole not having a dishwasher thing is really getting old). Libby’s is the first to offer ready-to-heat vegetables in pouches. I don’t have to feel bad about throwing the package away, either — I’m a hippie like that — because pouches use 75% less energy annnddd waste is easily compressed, reducing space in home disposal and landfills. An added bonus is that the pouches are made with BPA non-intent materials.

Tip: the pouches will be available nation-wide come the new year and can currently be found in select Walmart stores.

green_bean_pomegranate_sweet_potato

But none of the aforementioned perks matter if it’s not tasty, right? Lucky for me (and you all), Libby’s Vegetable Pouches are delicious and come in five popular varieties – sliced carrots, sweet peas, cut green beans, mixed vegetables and sweet corn.

I chose the cut green bean variety as the star of my warm green bean, pomegranate and sweet potato salad.warm_thanksgiving_vegetable_salad

This salad is a GAME ˆ CHANGER. It would be a welcome addition to any Thanksgiving table and it takes LESS THAN TEN MINUTES TO MAKE! Not to mention it is no-bake (a microwave is the only cooking vessel you need), since oven space is quite precious on Thanksgiving. Plus, with “exotic” sounding ingredients like pomegranate, rosemary and cinnamon pecans, you’ll appear to be the best, most knowledgable chef around.

Recipe: Warm Green Bean, Pomegranate and Sweet Potato Salad

Enjoy this while it’s still warm, or refrigerate and eat cold. This would be delicious served alongside chicken or turkey — or eat it by itself! It’s really that good. If you don’t have pomegranates around, you can swap them for dried cranberries.

Ingredients:

  • 1 medium sweet potato
  • 1 pouch Libby’s Cut Green Beans
  • 1 cup pomegranate arils (seeds), or the seeds from one medium pomegranate (use the pre-seeded version to save time — I find them frozen at Costco or fresh at Trader Joe’s)
  • 1/2 cup raw pecans
  • 1 tsp. butter, preferably grass-fed
  • 1/4 tsp. cinnamon
  • 1/4 cup parmesan cheese
  • 1 1/2 Tbsp. olive oil
  • 1 1/2 Tbsp. balsamic vinegar
  • 1 Tbsp. honey (look for an ethically harvested variety — find out more about the honey/bee issue here)
  • 1 tsp. dried rosemary
  • 1/4 tsp. salt
  • 1/4 tsp. black pepper

ingredients_warm_green_bean_salad

Directions:

  1. Poke holes in sweet potato using a fork. Microwave sweet potato for 2-3 minutes. Flip sweet potato over and microwave for an additional 2-3 minutes, or until it feels soft.
  2. While the sweet potato cooking, melt butter in a small skillet, add pecans and cinnamon and stir for 2-3 minutes to toast.
  3. Prepare pomegranate. The best way to do this is to roll the pomegranate on the counter before cutting it — you should feel and hear the seeds loosening up. Then, inside a metal or glass bowl (the juice could stain a plastic bowl) cut the pomegranate into quarters and dig out the seeds. Or, use pre-prepared pomegranate seeds to save some time.
  4. When sweet potato is done in the microwave, swap it out for the Libby’s Cut Green Bean Pouch and cook according to package instructions.
  5. While the green beans are cooking, cut the sweet potato into small cubes.
  6. Drain heated green beans and add to a large bowl along with remaining ingredients (including toasted pecans). Toss and serve warm.

green_bean_pomegranate_sweet_potato_salad

Voila! Enjoy this super-easy, amazingly delicious salad!


Vegan Moroccan Stew {Recipe ReDux}

Scary spices.

No, I’m not talking about your least favorite Spice Girl. I’m talking the theme for this month’s Recipe ReDux:

Spooky Spices: You know they are lurking there: Way in the back of your spice drawer. There lie the herbs, spices, or rubs that are getting dusty because you’re afraid to use them… you simply don’t know what to do with them! Well, pull them out and show us a recipe you created to deliciously conquer that fearful spice. (Or maybe the recipe was a flop – and the spice still give you nightmares?!)

I’d say I’m not scared of too many spices. I love to combine spices in unusual ways to completely alter/upgrade a recipe.

So at first, I was completely stumped.

Then, like a gift from the gods, my friend gave me some amazing saffron. I like the flavor and color that saffron brings to recipes, but I had never used it in my own cooking.

saffron

So, I started doing my research and one article gave mention of using saffron with cinnamon and cumin — SOLD! Saffron can give a bitter taste to dishes if not treated properly. To make sure I mantained the beautiful taste and depth that saffron can lend, I first ground the saffron using a mortar and pestle (my Grandma’s mortar and pestle, in fact — brought all the way from Turkey). Then, I steeped it — like you would tea — in hot (but NOT boiling) water for about 30 minutes, yielding the most beautiful golden liquid.

vegan_moroccan_saffron_stew

From there, it was time to make stew! Not just any stew…Moroccan-style, VEGAN, warming stew. Enjoy!

Recipe: Vegan Moroccan Stew

This dish is perfect for a cool fall day. If you need gluten-free, use one block of extra firm (crumbled) tofu in place of the tempeh.

Ingredients:

  • 1 pinch saffron (about 25 strands)
  • 1/2 cup water
  • 1/2 white onion, sliced
  • 1 eggplant, cubed
  • 3 cups mushrooms, such as criminis, sliced
  • 2 Tbsp. coconut or olive oil
  • 2 blocks tempeh, crumbled by hand
  • 1 can diced tomatoes, preferably no salt added
  • 1 tsp. cinnamon
  • 1 tsp. ground cumin
  • 1 tsp. dried basil
  • 1 pinch saffron
  • 1 tsp. salt
  • 1/2 cup apple juice
  • 1/3 cup raisins

Directions:

  1. Heat 1/2 cup water until hot, but not boiling. While water is heating, grind saffron using a mortar and pestle, or even with your fingers if you don’t have a mortar and pestle. Add the ground saffron to a small dish and pour hot water over it. Let steep.
  2. In a large pot, saute onion in oil. Once onions are translucent, add mushrrooms and eggplant and saute for 10 minutes.
  3. Add tomatoes, crumbled tempeh, spices, salt, apple juice, steeped saffon/water combo and raisins and simmer for 30-45 minutes.
  4. Garnish with raisins or a sprinkling of ground saffron if desired.

vegan_tempeh_saffron_stew

Check out how fellow Recipe ReDuxers use “spooky spices” by clicking on the little blue guy below. Enjoy!

Eggplant Chips with Roasted Garlic Pumpkin Hummus {Recipe ReDux}

My Grandma used to make the most delicious roasted eggplant with yogurt sauce. Velvety smooth, garlicky, cooked for hours…

The fact that I could never duplicate that dish could be attributed to many things — I didn’t use enough oil, I went too light on the garlic, I used the wrong type of yogurt for the sauce — but when it all boils down, no one can do it better than Grandma. Am I right?

While I love my Grandma’s eggplant dish, I myself could never really get eggplant right. It would turn out soggy or tasteless or morph into a weird texture when cooked. I loathe eggplant because I am a perfectionist and, well, the things I created up until now were far from perfection.

I’m always up for a challenge, though, so for this month’s Recipe ReDux theme of dehydrated food (either doing the dehydrating yourself or incorporating dehydrated ingredients into a dish), I figured it was time to meet my culinary nemesis.

Eggplant, you ain’t got nothing on me. Doesn’t hold a candle to Grandma’s Eggplant, but it’s pretty damn delicious.

eggplant_chips_pumpkin_hummus

It turns out eggplant chips aren’t so difficult. And you don’t even need a fancy dehyrator. Nope, these were dehydrated right in our old crappy oven.

What really makes these eggplant chips, though, is that dreamy pumpkin hummus made with roasted garlic.

peeled_garlic

Do you all know the trick to peeling a lot of garlic very quickly?

Peel the outside layers off of the bulb, plop the whole thing in a container with a lid, and shake it like a Polaroid picture. Like, really shake it. Your muscles should be sore, no joke. I don’t know how, but this assault to the garlic magically gets all of the peels off while keeping each clove intact.

This is a great party trick, depending on the type of party.

So once you’ve magically peeled your garlic, it’s ready to be roasted on the stove. Just place it in a small saucepan, pour in enough olive oil to cover the cloves fully, and heat the oil/garlic until it starts to simmer. Then remove from heat and let cool.

You now have both roasted garlic AND garlic-infused olive oil! Now what to do with all of this deliciousness?

pumpkin_hummus

Hummus, obviously! And since it feels like fall in Chicago, PUMPKIN hummus. The roasted garlic and garlic oil also make an excellent pesto sauce, FYI.

Recipe: Eggplant Chips with Roasted Garlic Pumpkin Hummus

You can eat these together or separately, they are both delicious in their own right. I can’t wait to try the eggplant chips with a yogurt sauce and the hummus with, lets be honest, everything. Man I love hummus.

Ingredients

Eggplant Chips:

  • 1 medium eggplant, sliced into very thin rounds (1/8″ or 1/16″). Use a mandolin if you have one.
  • Cooking spray
  • Salt

Pumpkin Hummus

  • 2 (16 oz) cans low sodium chick peas, drained and rinsed
  • 1 can pumpkin, or 2 cups roasted/pureed pumpkin
  • 1/4 cup garlic olive oil (see above for how to make your own)
  • 4-6 cloves roasted garlic (also see above)
  • 1/4 cup water
  • 2 Tbsp. tahini or nut butter, such as almond or cashew butter
  • 2 Tbsp. local honey
  • 1 Tbsp. dried rosemary
  • 1 Tbsp. salt
  • 1/2 Tbsp. cumin
  • 1/2 Tbsp. red pepper flakes
  • 1 tsp. smoked paprika
  • 1 tsp. black pepper
  • 1 tsp. cinnamon

sliced_eggplant

Directions

Eggplant Chips:

  1. Preheat oven to 200 degrees.
  2. Place metal cooling racks on top of baking sheets (I needed two in order to fit all of the eggplant). The cooling racks allow air to circulate around the whole eggplant chip, helping it to dehydrate more effectively.
  3. Spray the cooking rack with cooking spray. Salt one side of the eggplant piece, then lay salted side down on the rack. Do this with all of the eggplant rounds, then spray the tops of the eggplant with cooking spray and sprinkle salt over the eggplant (so that both sides are salted). This will help draw moisture out during the dehydrating process.
  4. Place baking sheets in oven and bake for 30 minutes. Rotate pans then bake for another 30 minutes. Flip the chips and then bake for another 15-30 minutes, or until the eggplant is slightly browned and crispy.

Pumpkin Hummus:

  1. Place all ingredients in a large food processor and process until desired consistency.
  2. Refrigerate for at least 30 minutes before serving. Drizzle with honey and olive oil for serving.

eggplant_chips_hummus

{side note: how frickin’ adorable is the green polka dot mini casserole dish in the picture?! Expect a fruit crumble or vegetable bake at some point in the very near future. Thank you, World Market.}

For more amazing dehydrated recipes from the talented Recipe ReDuxers, follow the link below (click on the little blue guy).

Avocado, Apple and Cabbage “Green” Slaw

Happy Labor Day, y’all! (I am not from the south and really should never use the term, “y’all” but it seemed necessary here).

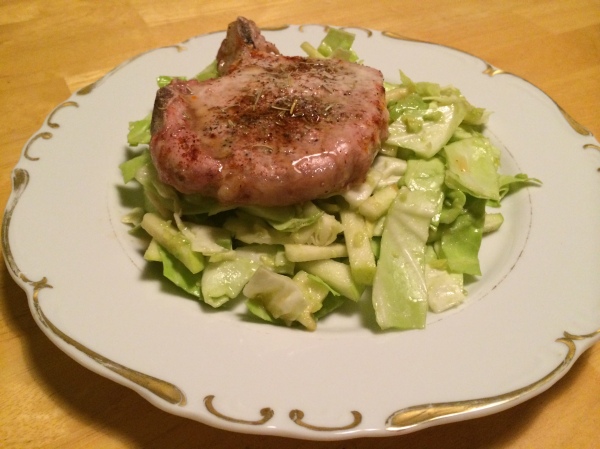
If your Labor Day is going to see some BBQ action, make sure there are some healthy options available. This slaw is both creamy from the avocado and tart from the sour apple. It’s the perfect complement to meat or other grilled proteins. 

If you can’t find sour apples — mine were from my local farmers market — you can most definitely use tart green apples.

apple_avocado_slaw

Avocado, Apple and Cabbage Slaw

This recipe is perfect with meat, chicken or fish. The apples add a nice tartness that cuts through any fattiness of meat.

Ingredients:

  • 1/2 head green or red cabbage
  • 1 fresh, ripe avocado
  • 1 sour apple, julienne-style (or use a green apple)
  • 1 Tbsp. apple cider vinegar, such as Bragg’s
  • 1 Tbsp. lemon juice
  • 1/2 tsp. salt

Directions:

  1. Peel, seed and mash avocado
  2. Roughly chop cabbage (should be thin strands)
  3. Mix cabbage with mashed avocado, julienned apple, vinegar, lemon juice and salt. 

Happy grilling!

apple_avocado_slaw_pork

Gluten-Free Rosemary Butternut Squash Bake {Sponsored Recipe ReDux Post}

I received free samples of Breton Gluten Free Original with Flax and Breton Gluten Free Herb and Garlic from Dare Foods Incorporated mentioned in this post. By posting this recipe I am entering a recipe contest sponsored by Dare Foods Incorporated and am eligible to win prizes associated with the contest. I was not compensated for my time.

gluten_free_butternut_squash

Happy Mother’s Day everyone! I just got back from celebrating all of the wonderful mothers, grandmothers and great-grandmothers in my life — they are all truly amazing woman whom I admire so much and can only hope to be like “when I grow up.” I hope that you all were also able to celebrate the mamas in your life today!

While May means Mother’s Day for many (and my birthday — hint, hint), it is also Celiac Disease Awareness Month. According to the University of Chicago, Celiac Disease affects 1 in 133 people. These people MUST avoid gluten as consumption of gluten-containing foods (those that have wheat, barley and/or rye in them) causes an inflammatory reaction in which the intestines essentially attacks itself.

Yikes! Not so fun.

Luckily, there are an increasing number of amazing gluten-free products out there so that those with Celiac Disease and those who are sensitive to gluten can continue to enjoy their favorite foods.

Crackers are one of those foods for me. They must be crunchy when you first bite into them but then turn melt-in-your-mouth buttery and soft as you eat them. They should be a generous size so that you can pile on toppings for a quick snack. And if they have added nutritional benefits — like flax seeds — I’m all over it.

So when the folks at Dare Foods asked us to create delicious, gluten-free recipes using their line of gluten-free Breton crackers, I was thrilled to play around. These crackers exceeded my expectations for what a cracker should be, AND they have the added benefit of being gluten-free!

Breton Gluten Free US

breton_butternut_squash

Dare Foods (www.darefoods.com) sent me both varieties of their gluten-free crackers to play with:

  • Breton Gluten Free Original with Flax crackers
  • Breton Gluten Free Herb and Garlic crackers

While I loved both, I was drawn toward the Original crackers not only for their taste but also because they have the following attributes (as do the Herb & Garlic variety):

  • Certified gluten free by the Canadian Celiac Association’s Gluten Free Certification Program
  • Kosher dairy OU-D
  • Low in saturated fat
  • Made with arrowroot and green lentil flours
  • No artificial colors or flavors
  • No cholesterol
  • Peanut free
  • Trans fat free

While I enjoy snacking on crackers — especially when I can dip those crackers in hummus, guacamole or some other delicious dip — I wanted to make something a little more special. A butternut squash bake with rosemary, cheese, and Breton Gluten Free Original with Flax crackers sounded fantastic to me (and was!).

This is a dish that everyone can appreciate, whether gluten-free or not. Enjoy!

**SIDE NOTE: I DISCOVERED A MICROWAVE/OVEN COMBO FOR MAKING THE BUTTERNUT SQUASH THAT HELPED CUT THE COOKING TIME IN HALF. SEE BELOW FOR INSTRUCTIONS**

Recipe: Gluten-Free Rosemary Butternut Squash Bake

The earthiness of rosemary pairs beautifully with the sweet-nutty flavor of butternut squash. Topped with a crushed Breton Gluten Free Original with Flax crackers/four-cheese blend, the bake is divine! The whole family can enjoy this, whether they’re gluten-free or not.

gluten_free_butternut_squash_bake

Ingredients:

  • 1 small butternut squash
  • 2 sprigs fresh rosemary, or 1 Tbsp dried rosemary
  • 1 Tbsp olive oil or melted grass-fed butter
  • Salt and pepper to taste
  • 12 Breton Gluten Free Original with Flax crackers
  • 1/4 cup four cheese blend (I used Trader Joe’s Quattro Fromaggio)

Directions:

  1. Preheat oven to 375 degrees
  2. Poke holes in whole butternut squash using sharp knife (be careful here!) Microwave whole, pierced butternut squash for 4-5 minutes, or until squash has softened. Let squash cool for 5-10 minutes so that it is cool enough to cut.
  3. Cut squash down the middle (so that stem is one piece and the bottom/base is the other piece). Using a paring knife, cut away the skin of the squash. Next, cut the peeled squash into wedges. Place wedges in a casserole dish.
  4. Top the squash with the two rosemary springs (minus the stems). Drizzle with olive oil or butter and sprinkle with salt and pepper to taste. Bake at 375 degrees for 15-20 minutes. butternut_squash_bake_ingredients
  5. In a sandwich-size zip-top bag, add Breton Gluten Free Original with Flax crackers. Seal the bag and crush the crackers until they become crumbs. Add cheese to the bag, seal, and shake the whole thing around to mix.
  6. Remove squash from oven and sprinkle with cracker and cheese mixture. Bake for an additional 5-10 minutes, or until the cheese is melted and the whole thing browns a bit on top. butternut_squash

This dish would be great at a family get-together, or anytime to want to add deliciousness to your dinner. Make extra — it holds up really well in the fridge or freezer.

gluten_free_butternut_squash

Check out the many other delicious, gluten-free recipes featuring Breton Gluten Free Crackers by following the link below!